

How To Put Wrds Over An Image In Microsoft Word
In Microsoft Part, y'all utilize either WordArt or a text box to add text on top of a photograph. You can motility the WordArt or text box over your photo so, depending on which Microsoft Office programme you're using, rotate the text to best fit your photo.
The all-time method to use depends on what you're trying to achieve and which Microsoft Office program you are using. Do yous want the text to have a very stylized look? Are you trying to attain an affect like to what y'all might see on a postcard? Is the text brusque in length? If and so, then WordArt might be your best choice.

The other option to add text on top of a photograph is to depict a text box, blazon the text you desire in the text box, and so make the background and outline of the text box transparent. You can format the text in the text box, just as you format text anywhere in Office. This choice is peculiarly useful when you lot desire to add together more than just a word or two to your photo.

Select the Function plan that you are using from the drib-downward listing.
Utilise WordArt to add text on top of a photograph
-
In your spreadsheet, make sure that you've inserted a photo.
-
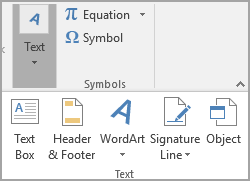
On the Insert tab, in the Text group, click WordArt, click the style of text you lot desire, and then type your text.
-
Click the outside edge of the WordArt to select information technology, drag the text over your photograph and then, if you lot want, rotate the text to the bending that works all-time for your photograph.
-
Click the outside border of the photo, press and hold CTRL, so click the edge of the WordArt then that both items are selected.
-
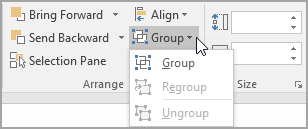
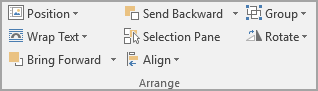
Nether Drawing Tools, on the Format tab, in the Suit grouping, click the arrow next to Group, and then click Group.
Use a text box to add text on summit of a photo
-
In your spreadsheet, make certain that yous've inserted a photo.
-
On the Insert tab, in the Text grouping, click Text Box, click anywhere near the movie, and then blazon your text.
-
To alter the font or fashion of the text, highlight the text, correct-click it, and so select the text formatting you desire on the shortcut menu.
-
Click the outside border of the text box, elevate the text over your photo and then, if you want, rotate the text to the bending that works best for your photo.
-
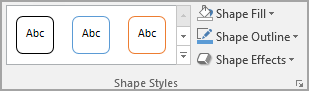
Brand sure that the text box is notwithstanding selected, then, under Cartoon Tools, on the Format tab, in the Shape Styles group, exercise the following:
-
Click Shape Fill, and then click No Make full.
-
Click Shape Outline, and so click No Outline.
-
-
Click the outside edge of the photo, printing CTRL, and then click the edge of the text box and so that both items are selected.
-
Under Drawing Tools, on the Format tab, in the Arrange group, click the pointer next to Group, and then click Group.
Top of folio
Use WordArt to add text on elevation of a photo
-
In your presentation, brand sure that you've inserted a photograph.
-
On the Insert tab, in the Text group, click WordArt, click the style of text yous want, and then blazon your text.
-
Click the outside edge of the WordArt to select it, drag the text over your photo and and then, if y'all want to, rotate the text to the angle that works best for your photograph.
-
Click the outside edge of the photograph, printing and hold CTRL, and then click the edge of the WordArt so that both items are selected.
-
Under Drawing Tools, on the Format tab, in the Adjust group, click the pointer adjacent to Grouping, then click Group.
Use a text box to add text on acme of a photo
-
In your presentation, brand certain that you lot've inserted a photo.
-
On the Insert tab, in the Text grouping, click Text Box, drag to draw a text box anywhere near the picture, and so type your text.
-
To alter the font or style of the text, highlight the text, correct-click it, so select the text formatting y'all desire on the shortcut carte.
-
Click the outside border of the text box, drag the text over your photo and then, if you want, rotate the text to the angle that works all-time for your photograph.
-
Brand sure that the text box is still selected, and then, under Drawing Tools, on the Format tab, in the Shape Styles group, do the post-obit:
-
Click Shape Fill, and then click No Make full.
-
Click Shape Outline, and and then click No Outline.
-
-
Click the outside edge of the photograph, printing CTRL, and then click the edge of the text box so that both items are selected.
-
Under Drawing Tools, on the Format tab, in the Accommodate group, click the arrow side by side to Group, and then click Group.
Top of page
Use WordArt to add text on top of a photograph
-
In your document, click to select an insertion bespeak.
-
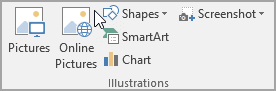
On the Insert tab, in the Illustrations grouping, click Shapes, and then click New Drawing Canvas.

-
Click the drawing sail, and then, on the Insert tab, in the Illustrations group, click Pictures.
-
Browse to and double-click the photo that you want to use.
-
On the Insert tab, in the Text group, click WordArt, click the style of text you want, and so type your text.
-
Click the outside edge of the WordArt to select information technology, drag the text over your photo and and so, if you want, rotate the text to the angle that works best for your photograph.
-
Click the outside edge of the photograph, press and concur CTRL, and then click the border of the WordArt and then that both items are selected.
-
Nether Picture Tools, on the Format tab, in the Conform group, click the arrow next to Group, so click Grouping.
Use a text box to add text on top of a photo
-
In your document, click to select an insertion point.
-
On the Insert tab, in the Illustrations grouping, click Shapes, so click New Drawing Canvas.
-
Click the cartoon canvas, and then, on the Insert tab, in the Illustrations group, click Pictures.
-
Browse to and double-click the photograph that you want to use, then click outside the drawing canvas.
-
On the Insert tab, in the Text group, click Text Box, and then at the bottom of the carte du jour, click Draw Text Box.
-
Type the text that you want to appear in the text box, and and so drag the text box to the location that you desire.
-
To modify the font or style of the text, highlight the text and and so select the text formatting you want on the shortcut carte du jour.
-
Click the outside edge of the text box, and then drag the text box to position it over your photo.
-
Make sure that the text box is even so selected, and so, under Drawing Tools, on the Format tab, in the Shape Styles group, do the following:
-
Click Shape Fill, then click No Make full.
-
Click Shape Outline, and and then click No Outline.

-
-
Click the exterior edge of the photo, press and hold CTRL, and then click the edge of the WordArt so that both items are selected.
-
Under Drawing Tools, on the Format tab, in the Arrange group, click the arrow next to Grouping, and then click Grouping.
Superlative of page
Of import: Part 2007 is no longer supported. Upgrade to Microsoft 365 to work anywhere from any device and continue to receive back up.
Upgrade now
Select the Office programme that you are using from the drop-down listing.
Apply WordArt to add together text on pinnacle of a photo
-
In your spreadsheet, make sure that you've inserted a photo.
-
On the Insert tab, in the Text group, click WordArt, click the way of text you want, and then type your text.
-
Click the outside border of the WordArt to select it, drag the text over your photograph and then, if you want, rotate the text to the angle that works best for your photo.
-
Click the outside edge of the photograph, printing and hold CTRL, and and so click the edge of the WordArt so that both items are selected.
-
Under Drawing Tools, on the Format tab, in the Arrange group, click the arrow next to Group, and then click Grouping.
Use a text box to add together text on meridian of a photo
-
In your spreadsheet, make sure that yous've inserted a photo.
-
On the Insert tab, in the Text grouping, click Text Box, click anywhere near the picture, and then type your text.
-
To change the font or mode of the text, highlight the text, right-click it, and then select the text formatting you want on the shortcut menu.
-
Click the exterior border of the text box, drag the text over your photograph and then, if you want, rotate the text to the angle that works best for your photograph.
-
Brand sure that the text box is still selected, and then, under Drawing Tools, on the Format tab, in the Shape Styles grouping, do the following:
-
Click Shape Fill, and and so click No Fill.
-
Click Shape Outline, and then click No Outline.
-
-
Click the outside edge of the photo, press CTRL, and so click the edge of the text box so that both items are selected.
-
Under Drawing Tools, on the Format tab, in the Arrange group, click the pointer next to Grouping, and and then click Group.
Top of page
Employ WordArt to add together text on tiptop of a photo
-
In your presentation, brand sure that yous've inserted a photo.
-
On the Insert tab, in the Text group, click WordArt, click the style of text you want, then type your text.
-
Click the outside edge of the WordArt to select information technology, drag the text over your photo and so, if you want to, rotate the text to the angle that works best for your photo.
-
Click the outside edge of the photograph, press and concur CTRL, and then click the edge of the WordArt and so that both items are selected.
-
Under Drawing Tools, on the Format tab, in the Accommodate group, click the pointer next to Group, and then click Group.
Apply a text box to add text on top of a photo
-
In your presentation, make certain that you've inserted a photo.
-
On the Insert tab, in the Text grouping, click Text Box, drag to draw a text box anywhere near the picture, so blazon your text.
-
To change the font or fashion of the text, highlight the text, right-click it, and and then select the text formatting you desire on the shortcut menu.
-
Click the outside edge of the text box, elevate the text over your photo and and then, if y'all desire, rotate the text to the angle that works best for your photo.
-
Make sure that the text box is still selected, and so, under Cartoon Tools, on the Format tab, in the Shape Styles group, practise the following:
-
Click Shape Fill, and so click No Fill.
-
Click Shape Outline, and then click No Outline.
-
-
Click the outside edge of the photo, printing CTRL, and and so click the edge of the text box and then that both items are selected.
-
Nether Drawing Tools, on the Format tab, in the Arrange grouping, click the arrow next to Group, and then click Group.
Acme of page
Use WordArt to add text on acme of a photo
-
In your document, click to select an insertion point.
-
On the Insert tab, in the Illustrations group, click Shapes, and then click New Drawing Canvas.
-
Click the cartoon sail, and so, on the Insert tab, in the Illustrations group, click Picture.
-
Browse to and double-click the photograph that you want to utilise.
-
On the Insert tab, in the Text group, click WordArt, click the style of text you want, so type your text.
-
Click the outside edge of the WordArt to select it, drag the text over your photo and then, if you want, rotate the text to the bending that works all-time for your photograph.
-
Click the outside edge of the photo, press and hold CTRL, and so click the edge of the WordArt so that both items are selected.
-
Under Drawing Tools, on the Format tab, in the Arrange group, click the arrow next to Group, and then click Grouping.
Employ a text box to add text on top of a photograph
-
In your document, click to select an insertion bespeak.
-
On the Insert tab, in the Illustrations grouping, click Shapes, so click New Drawing Sail.
-
Click the drawing canvas, and so, on the Insert tab, in the Illustrations group, click Picture.
-
Browse to and double-click the photograph that you desire to employ, and and so click outside the drawing canvas.
-
On the Insert tab, in the Text group, click Text Box, and then at the bottom of the card, click Depict Text Box.
-
Type the text that yous want to appear in the text box, and so drag the text box to the location that you want.
-
To change the font or style of the text, highlight the text and then select the text formatting you want on the shortcut menu.
-
Click the exterior border of the text box, and so drag the text box to position it over your photograph.
-
Make certain that the text box is even so selected, and so, under Text Box Tools, on the Format tab, in the Text Box Styles group, practise the following:
-
Click Shape Make full, and then click No Fill.
-
Click Shape Outline, and so click No Outline.
-
-
Click the outside edge of the photo, press and hold CTRL, and then click the edge of the WordArt so that both items are selected.
-
Under Drawing Tools, on the Format tab, in the Conform group, click the arrow next to Grouping, and then click Grouping.
Top of page

Source: https://support.microsoft.com/en-us/office/add-text-on-top-of-a-photo-24ec392b-4c0d-4ec2-82a1-ce8da4e4f5da
Posted by: norwoodthisper.blogspot.com
0 Response to "How To Put Wrds Over An Image In Microsoft Word"
Post a Comment